Archive | Other Skills RSS feed for this section

Drifting Cars and Your Hand Positions for the Handstands!

So this post comes a bit later than usual because I’ve been busy doing a small update on the training studio while getting ready for a bigger update. Hint: Colors are awesome!

For today’s post I’m going to be talking about cars and your handstand.

Specifically how your hand positioning can affect how much drive and control you need to balance while you kick up into the handstand.

Tumbling Illustrated
Tumbling Illustrated on Amazon

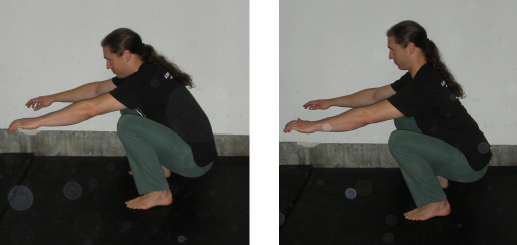
There are two main hand positions your see. Either with your fingers facing forward or with you fingers externally rotated to the side. Although I have been known to play with my hands turned in as well.

Either way you choose to position your hands will work. But each position has its own set of rules to help you achieve the balance you’re looking for.

Lets take the turned out or externally rotated position. You can liken this position to a force choke in star wars. With the alignment of this position, your kick up becomes smoother and faster. Which means that you need to have good solid control to put on the brakes once you’ve reached the apex and are ready to keep the hold.

In contrast, the fingers forward position is similar to drifting. The muscles and fascia counterbalance each other to create drag and slow down your kick up. This gives you a little more control so that you don’t fall over on your backside. Although you might have a problem with underkicking the handstand or not kicking with enough force to get into position.


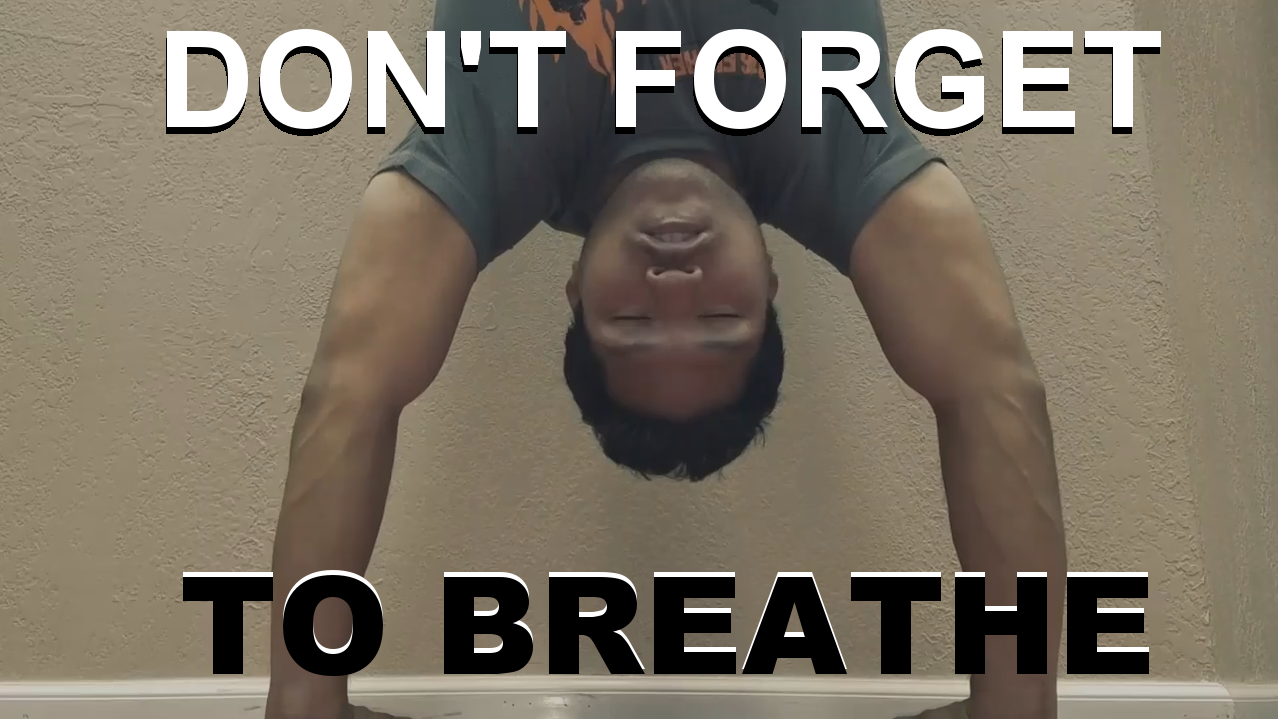
Test which version works best for you and look at the video below for deeper information and demonstrations on learning how to drift your handstands.

To get a done-for-you blueprint on the handstand check out The Secrets of the Handstand System today!

Stay Inverted!
-Jonathan Magno

Comments { 0 }

A Superhero Solution to a Tiring Exercise

The Burpee!

There. I’ve said it.

Love it or hate it. The burpee is a mainstay in most fitness routines. I’ve even used it in my programming, although sparingly. Don’t get me wrong, the burpee is a solid exercise covering many different muscles groups while including strength, balance work, and power development. Although I normally see people use it as an ending metabolic finisher or something to throw in and get their clients tired. Honestly, it actually pains me to watch people run through technique without activating the correct muscles.

There’s a lot going on in that seemingly simplistic exercise, but that’s for another day and another breakdown.

Trampoline Handbook
Trampoline Handbook on Amazon

Today I’m going to talk about doing something different with your burpee. Giving it a little bit more mobility, while also working on your motor control and endurance.

I usually breakdown the normal burpee into 3 different pieces. No different here.

This Superhero burpee includes a forward crawl, lateral jump, and even a cartwheel!

Take a look below to see how you can turn your burpee more superheroic: Spider-Man Style!

If you liked the video and want to develop your body’s endurance and conditioning, check out The Ultimate Guide to Bodyweight Conditioning!

Stay Inverted!
-Jonathan Magno

Comments { 0 }

An Easy Fix to a Pressing Predicament

Today we are going to jump back towards simpler times with a supposedly simple exercise.

The Pushup.

Although it is a seemingly easy exercise, it can cause trouble for some people.

Whether it be sinking of the hips or lack, lack of core engagement, or any of the other number of possible problems.

Don’t worry though.

There are many methods to fix your pushup, and I’ve found a simple way to get you to feel the right movement while using a simple prop.

How to do the One Hand Handstand by Professor Orlick
ow to do the One Hand Handstand on Amazon

Take a look at the video below to see the simple tip to a better pushup!

If you liked the handstand pushup in the beginning of the video and want to develop them yourself, check out The Ultimate Guide to Handstand Pushups!

Stay Inverted!
-Jonathan Magno

Comments { 0 }

The Monkey Stall and your first freestanding handstand!

First off you’re probably wondering what a monkey is. Well its a foundational movement pattern from the folks at GMB or Gold Medal Bodies.

If you’ve been following LAOHB, you know two things.

  1. I like to joke around.
  2. I’m a big fan of their style of training.

So lets get back to the subject at handy. The monkey and your first freestanding handstand.

Usually when a person attempts their first handstand they place their hands on the ground and drive their legs up with the hope that they stay inverted. This can be scary for most people and can be a bit difficult to control when you are starting out. The reason being that you’re utilizing your strong posterior muscle groups to drive and then change to stabilize with hopes that you don’t fall on your back or on your face.

By a mix of training clients, personal training, and utilizing the GMB Method; I think I might have found an easier way to get up into the handstand without so much fear.

How to do the One Hand Handstand by Professor Orlick
ow to do the One Hand Handstand on Amazon

This is where the monkey comes in.

While the monkey is a locomotive pattern, its focus is on lateral movement. So while you are moving laterally, you can use your stronger muscle groups to focus on stabilizing. Its a simple answer to a scary question.

To illustrate I have another funny video below. I hope you like it and gain something new to play with!

To learn more about the monkey and the GMB Method, check out the GMB Elements Program

Stay Inverted!
-Jonathan Magno

Comments { 0 }

Mini-Handbalancing Work for a Mini-Holiday

Usually I am able to send out a post from my studio space in Sunnyvale, California; but today I’m sending out good vibes from Sunny Los Angeles while taking a mini getaway vacation. A couple of fun things involved checking out the KTOWN Night Market and today its all about hanging and training at Santa Monica Beach!

Which brings me to my next point. How do you make yourself work on your skills or even skill development while away?

Finding time to work on your skills in an unfamiliar place can be a difficult.

Luckily for me, my morning routine is pretty much set internally whether I’m surrounded by familiarity  or by new and epic experiences.

Although, just like any trip, preparation can be key and obviously we’re here to help!

So here are a few tips to get you going!

  1. We all know that you probably have a set list of things that you want to do while you’re away. So make sure you add a block of time for your training when you know you’ll get it done without distractions. If you think forward, you’ll be better prepped.
  2. Add a fitness tracker app to your phone. There are a lot of good ones out there that will keep you accountable, even when you’re not on a normal schedule.
  3. Final tip, check out the local parks. Likelihood is that there will be a good one a mile or two away from you if you’re in a city. This sets you up for a nice warm up run and cool down for your session,

BONUS TIP!!!

Some of you might be away from everything. Out in the middle of nowhere. If you are, then this is the perfect time to perfect your skillwork like your precision jumps or even the handstand pushup!

Hand Balancing Made EasyHandBalancingMadeEasy_on_Amazon

I hope these tips help you get a headstart to being healthy and active on your downtime. If you need some help on what skill to develop, check out logan performing the Handstand Pushup below!

Stay Inverted!
-Jonathan Magno

Comments { 0 }

Super-Stabilization for your inverted work!

Have you ever tried to do a handstand and held it for a second only to fall once again? Maybe you got into the movement only to immediately fall back into the ground. The key to staying up doesn’t just involve your strength but also your motor control. You should feel aligned and be confident in your stabilization.

This can be a tricky thing. especially when your goal is to both lengthen certain parts of your body while at the same time shorten other parts.

Trampoline Handbook
Trampoline Handbook on Amazon

So what can you do? Well I’ve got an exercise that can help you understand and walk that fine line.

The One-Armed Superman Plank.

Here are a couple of key points to think about.

Lengthening is important in this exercise, so make sure that you are outstretching your extended arm as much as possible.

Another key point is your alignment. So work hard to keep the outstretched bicep next to the ear and try your best to keep your hips parallel to the floor.

I know its going to be hard, but you can do this.

Finally, to really dig in, check the video below!

If you want to gain an in-depth approach to your handstands, check out the Secrets of the Handstand Quickstart System Now!

Stay Inverted!
-Jonathan Magno

Comments { 0 }

Breathing While Inverted

Today I’m going to be going over some points to help you with your  breathing. Whats funny is that these tips can help you even if you’re right side up.

Tip 1
Let yourself in the space that you are going to breathe naturally. Starting off in the right framework is a great way to initiate your instinctive nature to do whats needed.

Tips 2 and 3
Second, take a look at your alignment. Is your spine and neck straight? You can align your spine by keeping your biceps by your ears and also relieve possible tension on your neck by looking straight ahead and not down.

Tip 4
The final tip is to not overthink your breathing. If you’re too focused on it, you might unconsciously hold your breath. So to combat this, try talking to somebody or even singing!

Ultimate Guide to Handstand Pushups
Ultimate Guide to Handstand Pushups on Amazon

This post involved some pretty quick tips. To illustrate the information, I’m trying out a new way of delivering the information in a more cinematic fashion.  Check it out in the video below!

If you want to gain an in-depth approach to your handstands, check out the Secrets of the Handstand Quickstart System Now!

Stay Inverted!
-Jonathan Magno

Comments { 0 }

The Cossack or Side to Side Squat

In continuing with the theme of the squats, here is a nice variation that you’ve probably seen and utilized although without really digging down deep into the benefits that come along with utilizing this exercise. The skill I’m referring to is the Cossack Squat.

The Cossack Squat or Side to side squat has a range of benefits that aren’t attainable with the normal bodyweight squat. First of all, its a multi-planar movement pattern. When you move through the side to side squat you run through flexion, extension, abduction, adduction, internal, and external rotation of the hips. You’re pretty much targeting both the sagittal and frontal planes with this power packed excercise. Needless to say, that’s a whole bunch going on with one exercise and personally for me, it brings nostalgia involving the old martial arts days.

The hips and shoulders are of the most mobile joints that we have in our bodies. Being able to move through full range of motion in the joint capsule helps improve you functional range but might also deter you from some aches and pains down the road.

The types of pains that you could be saving yourself could be the lower back, knees, and even the hips themselves.

I suggest you test out the variation of the squat and see for yourself why its an important movement exercise.


Don’t forget, we still have The Ultimate Guide to Bodyweight Bodyweight Squats and Pistols for you to build out on your squatting skills!

How to do the One Hand Handstand by Professor Orlick
ow to do the One Hand Handstand on Amazon

Stay Inverted!
-Jonathan Magno

P.S. Do yourself a favor and look up Cossack Dance in google if you want to see where this move originates from.

Comments { 0 }

3 Mistakes You Might be Doing with your Bodyweight Squat

I’m going to start off by saying that there are many sources out in the world that will teach you correct form with your squats. Even we have a book called The Ultimate Guide to Bodyweight Bodyweight Squats and Pistols.

I’m going to take a different tact today and give you 3 mistakes you might be doing with your bodyweight squat.

Mistake #1 Rounding or Arching your Back

When I end up working with clients and have them do a squat , which is one of the key go-to bodyweight exercises that i give my clients with multitudes of variations, I will usually see one of these two things happen. A person will either be stuck in flexion of the back and become overly arching or have posterior tilt, although without engaging some of the other stabilizers like the abdominals or lats. Rarely do I see somebody with strong technique on the first go. A good test is to see where you land by having a profile view of yourself near a mirror completing the squat.

Mistake #2 Knee Position

I’m going to give you two knee placements that could be hurting your squat. The first is to have your knee extend past your toes. This can cause an excess load on your joints and is usually when I have somebody tell me their knee strains while they squat and asks for variations. The second knee position to look out for is when they collapse or pull towards each other. When this happens, you’ll tend to feel more load on your ankles or a bit of over-stabilization on your lower back.

Mistake #3 Foot Placement

Foot placement is important as well because you are working from a closed kinetic chain. Basically your foot is stationary and practically glued to the floor and everything else that is connected in proximity; knees, ankles, and hips have to move around your foot as a base point. If your foot is in an imbalanced position, it can thoroughly effect your squat as your other muscles have to compensate for that imbalance.

Learn How to Back Flip in 31 Days
Learn How to Back Flip in 31 Days on Amazon

There you go! 3 possible mistakes with your squat. One final note. The human body was created with a buffer for variance. As long as you stay within a safety range of movement, you’ll be fine. Also don’t forget to listen to your body. If something hurts; remember there is a difference between pain and the burning sensation from working a muscle, analyze your body mechanics and see if you might be doing one of the 3 mistakes above.

If you want to learn more or even master your bodyweight squat, get The Ultimate Guide to Bodyweight Bodyweight Squats and Pistols.

Stay Inverted!
-Jonathan Magno

Comments { 0 }

Surgery, a Pit Crew, and Lateral Thinking

Quite often I like to take part in what a friend and I have dubbed jokingly as “Lift and Learn.” This occurs when I end up expanding my mind and knowledge while doing a task that is repetitive and labor intensive. For me this means listening to an audio book to increase my knowledge base unless I really need to get moving with music.

During one of my Lift and Learn sessions, I was listening to a book called Smartcuts: How Hackers, Innovators, and Icons Accelerate Success, by Shane Snow. This is a great book that is full of case studies on hacking and lateral thinking. One of the chapters that really hit home involved a team of Surgeons at a children’s hospital in London and their percentage of success during their handovers between the operating room and the intensive care unit.

I’m not going to go into great detail about what was discussed during this chapter in the book, but I will give you the basics.

During a session of lengthy surgeries, two tired cardiac surgeons, Martin Elliot and Allan Goldman sat down at the television for a break. On their rest period, Formula 1® came on the television, and as they continued watching, one car pulled over to the side of the circuit for a pit stop. In that moment they came to a realization. While observing the pit crew get to work, they were astonished at how they were able to accomplish a set of tasks in 11 seconds that were pretty identical in concept to what they do in handover.

With this realization in place, a series of events occured that had the doctors learn the process of what the pit crew was able to achieve in coordination with heavier tools and an equally small space. From how their spacing from eachother, to the repetition placed into the tasks, and even involving a person overseeing the cohesion as a secondary duty. As they began to learn more, the doctors even hired a dance choreography to make sure that their movements were seamless in the operating room.

With all that hard work and the addition of lateral thinking, the team was able to decrease their handover errors by 66%. When you consider that these could involve serious or at worst life or death situations, that is a pretty staggering change.

The importance of the story is that you always have an option or choice to push through a seemingly impossible task. Sometimes you just need fresh eyes or a fresh perspective in order to clear out the cobwebs and continue on your journey. This doesn’t change even while you are training or learning skills. If you find yourself stuck or in a plateau, find something that in close proximity to the skill but with enough variance that its fresh. You might be surprised to realize that it will add to your development in the skill that was giving you trouble.

Before I sign off I want you to think about your handstands. The beginning stages have you working solely on the ground, but having a variance in elevation can open up the possibilities and freshness in your training. If you want to move laterally , pick up one of our handbalancing stands!

Stay Inverted!
-Jonathan Magno

Ultimate Guide to Handstand Pushups
Ultimate Guide to Handstand Pushups on Amazon
Comments { 0 }