Archive | Bridging RSS feed for this section

Parkour From Scratch #3 – Wall Run Tutorial – How to start Parkour

Happy Monday Everybody! I hope that you all had a great weekend and I know some of you spent time with the family this past Sunday. We’re starting back on our 3rd installment for the parkour series from TranquilMVMT with the Wall Run!

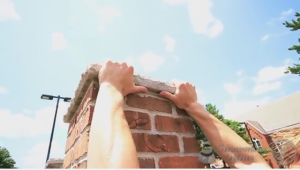
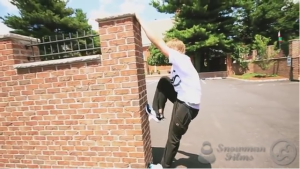
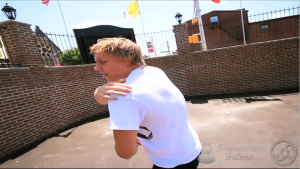
03_28_0103_28_05

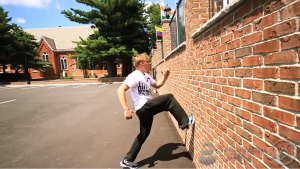
In this Tutorial. We Start off with your gathering steps. See which distance you have to be from the wall to take 3 steps and be in a nice position in order to place one leg and push off!

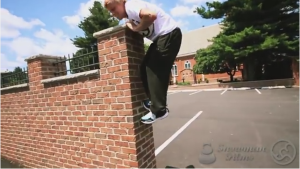
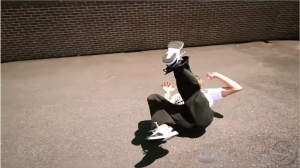
03_28_02

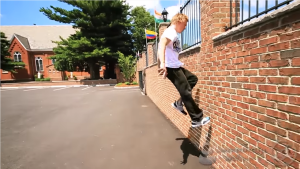
The next thing you want to do is drive up with the opposite knee while pushing off with the planted foot. Remember you don’t want to push away, but rather push up!

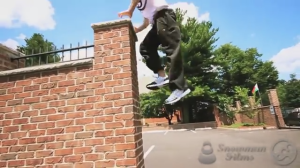
03_28_03

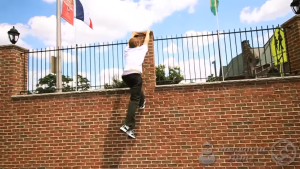
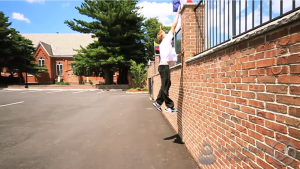
Finally reach up for the top of the wall, grab the ledge, and pull yourself up using the climb up  to complete your wall run.

03_28_04

Once again their videos are packed with info, so I suggest to watch below and get in-depth!

Remember guys, Parkour is all about getting from point A to point B in the most effective way possible. In order to do that, you have to feel mastery over your own body. With that said, we’ve got an awesome deal this month to jam-pack yourself with the information necessary to gain that mastery. Click Here to develop to start you on the course to Advanced Bodyweight Training!

Stay Inverted!
-Coach Jon

The True Art and Science of Hand Balancing
The True Art and Science of Hand Balancing on Amazon
Comments { 0 }

Handstand Pushup Variations

handstand pushup variations

Handstand pushup demonstrated by Logan Christopher of Lost Art of Hand Balancing


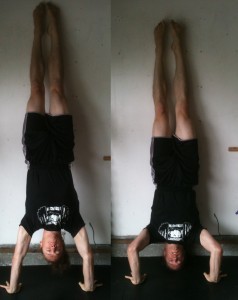
The handstand pushup is an advanced hand balancing skill that demonstrates shoulder strength, scapular mobility, and a proper challenge to those who are willing. But let’s say, for the sake of argument, that you’ve already achieved the handstand pushup, and are looking for something a bit more thrilling…some handstand pushup variations.

(Note: these handstand pushup variations aren’t only for the advanced trainees. In fact, variation 2 and 3 helped me to achieve my first HSPU, so don’t be afraid to try something new!)


Variation 1 : Lateral Handstand Pushup

Learn How to Back Flip in 31 Days
Learn How to Back Flip in 31 Days on Amazon

Well first, what would be the benefit of exploring different handstand pushup variations? Without the variations, there is still sufficient opportunity to progressively improve the intensity of the HSPU and get stronger with each turn. With the variations, however, comes the opportunity to increase all-angle strength in your training.

For instance, while the basic HSPU does a lot to strengthen your shoulders, traps, and scapular elevation, this lateral HSPU variation trains scapular protraction, retraction, and upward rotation. In addition, as your mobility increases, you can slow down and exaggerate the lateral movement to emphasize your one arm handstand balancing skill.


Variation 2: (Elevated) Backbend Pushup

Furthermore, your posterior deltoid has a critical role in your handstand stability, as it is the primary shoulder hyperextensor. One of my favorite handstand pushup variations to train for developing that strength is the back bend pushup.

The back bend alone is a powerful stability exercise that, with isometric tension, can provide incredible strength. The integrated strength, posterior deltoid strength, and scapular mobility that you can build from the back bend pushup will do wonders to strengthen your HSPU. To increase the difficulty of this exercise, elevated your feet by putting them onto a wall.

As I said, this exercise was a huge part of the reason I was able to develop the strength and range of motion for the HSPU.


Variation 3: Handstand Walking

Often times as kids, we have an easier time walking in a handstand than we do holding a stable handstand. However, having the strength to walk in a handstand position without compromising the integrity of your form can develop your technique, strength, and mobility fairly quickly.

This is one of my favorite handstand pushup variations to couple with the lateral HSPU, because it does the same work to progressively improve balancing strength on one arm, but has a much sharper focus on the shoulders and triceps because…well, you’re walking.

When you’re searching to advance not just in strength but also in skill, especially with hand balancing, be sure to add some fun and variation to your training, and you’ll be sure to see some results. Be sure to let us know in the comments how these variations help you, or if you’ve tried them before. Finally, if these do improve your training skill, be sure to share!

Comments { 1 }

Parkour From Scratch #2 – Climb Up Tutorial – How to start Parkour

Hey guys! It’s been a while. Logan and I have been working on the back-end putting some stuff together for you all and I also caught some nasty bug that’s been going around in my area. I wanted to come back strong with something that could put your autonomy, body feel, and endurance to the test. Today, we’re bringing you another segment of Parkour From Scratch with the Climb Up!

03_9_01

The first thing that TranquilMVMT looks at in this tutorial is your grip when you go into the climb.  Some people prefer to grip with the fingers themselves and others with the base of the fingers. Test it out, and see what works for you!

Tumbling Illustrated
Tumbling Illustrated on Amazon

03_9_0203_9_03

The next thing you want to do is figure out which driving foot you feel most comfortable with. Start first in a hanging squat position and then switch legs to see what would work best. Quick note is also to try and see if how long you can hold yourself up.

03_9_04

Lastly they discuss different ways of driving up from the elbow post, muscles up, and even utilizing a hip drive!(If you don’t know what I mean by hip drive, check out our A-Frame tutorial)

03_9_0503_9_06

Once again their videos are packed with info, so I suggest to watch below and get in-depth!

Parkour is all about getting from point A to point B in the most effective way possible. In order to do that, you have to feel mastery over your own body. With that said, we’ve got an awesome deal this month to jam-pack yourself with the information necessary to gain that mastery. Click Here to develop to start you on the course to Advanced Bodyweight Training!

Stay Inverted!
-Coach Jon

Comments { 1 }

Parkour From Scratch #1 – Shoulder Roll Tutorial – How to start Parkour

Hey guys! As you know, we’ve been looking for ways to really develop your acrobatic base and all your acrobatic skills. In this series, you will be getting the information you need to start in parkour from scratch! The first tutorial is all about the Shoulder Roll.

02_23_01

The first thing you want to do is focus on rolling out from your shoulder to your opposing hip. More specifically, you should start rolling from your trap or scapula and not the deltoid.

02_23_02

The next thing you want to do is either crunch or tighten your abs. That way you have a rigid surface to push off of the floor!

02_23_03

When putting it all together, create a diamond shape on the floor, pull your arm in, crunch abs, and roll forward from your shoulder to hip!

Ultimate Guide to Handstand Pushups
Ultimate Guide to Handstand Pushups on Amazon

02_23_04

There you go guys! Here is the full video for you.

Acrobatics are about autonomy and being mindful of your own movement. The Advanced Bridging Course February sale is almost over so don’t forget to grab it in order to build that strong and dynamic core necessary for acrobatics. To get the course, click here!

Stay Inverted!
-Coach Jon

Comments { 0 }

Superb Hand Balancing Mobility Drill

As you probably already know, I am a big fan of bridging exercises. The drill shown below is not for beginners, so make sure to take it slowly and easy to avoid getting injured.

Having said that, it’s an excellent mobility drill to add to your warm-up routine for hand balancing.

If you want to build strength, flexibility and acrobatic skill at the same time, make sure to check out my Advanced Bridging Course.

How to do the One Hand Handstand by Professor Orlick
ow to do the One Hand Handstand on Amazon
Comments { 1 }

How to Become a Performer in Cirque Du Soleil

What does it take to become a performer in Cirque Du Soleil?

Walking and Jumping On Your HandsWalking and Jumping On Your Hands on Amazon

16×9 crew followed Cirque Du Soleil members for four months in order to show you just how tough their training is and how good you need to be in order to become a part of the most popular theatrical production company in the world.

Even though this video is not entirely focused on subjects relevant to this website, like hand balancing and gymnastics, it’s well worth watching the entire episode. Enjoy!

P.S. If you’re not quite ready to become a part of Cirque Du Soleil, check out these resources and take that first step in the right direction.

Comments { 0 }

Yoga Scorpion Handstand Tutorial

The Scorpion handstand is a quite difficult move, where you bend your back and knees while in a handstand and touch the head with your feet or toes. Check out this video from Kino to see how it’s performed and what you can do to achieve it.

According to Kino, there are three main things to watch for before trying out the Scorpion handstand, also known as vrischikasana.

First of all, you need to be able to to confidently hold a straight handstand for a reasonable amount of time, like ten seconds.

Secondly, back bend or your spine flexibility needs to be fairly developed to be able to perform the Scorpion handstand. If not, you’ll need to work on improving that flexibility before trying out vrischikasana.

Learn How to Back Flip in 31 Days
Learn How to Back Flip in 31 Days on Amazon

Finally, you need to be relaxed and calm in order to let your body open and avoid tipping forward.

Most people looking to achieve this move do not have much problems with holding a handstand or being in a calm state of mind, but they do suffer from lack of flexibility. Check out this resource to improve flexibility and increase your range of motion. 

Comments { 1 }

Handstand Kickover

Doing a handstand kickover is fun and at the same time a smart choice of exercise.  However, it is not that easy to do as it may cause injuries especially if you do not know the basic steps. In this sense, it is necessary to know how to obtain a graceful and steady handstand.

Basic Steps of Handstand Kickover:

  • Find a wide and soft area. If you want to practice the move, the first thing to consider is finding a wide and safe area that ensures softer landing. This activity will make you fall most of the time so it is necessary to protect yourself from injury.
  • Stretch. Before starting, it is necessary to do some stretching such as rolling your neck, ankles and wrists. This will reduce the risk of getting injured and at the same time, these stretching exercises will make you more flexible.
  • Stand straight up lifting your hands over your head. Keeping your arms straight is crucial, then step forward, throw hands down and do the kick.
  • Kick one leg and take a forward step. When doing it, you should ensure that the skeletal system can handle or endure the load of your body. Thus, you should keep your fingertips align with your back foot.

Aside from the basic steps mentioned, you should also ensure proper balance of the body. Otherwise, it may lead to injury once you make a mistake in throwing your hands and kicking your legs. Likewise, while approaching the ground, always keep your arms straight. Keeping your arms and elbows bended can injure you.

Performing this handstand is not a piece of cake so you need someone to assist you if it’s your first time. If you are a beginner on doing handstands, this is not recommended for you. You should be able to do a handstand for two seconds, and a standing back bend before you can practice doing handstand kickover moves.

Learn How to Back Flip in 31 Days
Learn How to Back Flip in 31 Days on Amazon

If you want to learn a lot more on bridging movements like this be sure to check out the Advanced Bridging Course.

Comments { 0 }

Handstand Scorpion

The handstand scorpion is a minor contortion exercise where you go into a big back bend and bend the knees, usually touching them to the top of the head. Sometimes it’s taken even further and the feet come beneath the head.

Here’s a really good video that shows the handstand scorpion and more.

Learn How to Back Flip in 31 Days
Learn How to Back Flip in 31 Days on Amazon

She is also doing a movement she calls the Tic Toc which is going into the bridge and back. There may be a different use of that name for a move in gymnastics.

I’ve seen the handstand fall into a bridge before and done it myself. However getting back into the handstand from that position is much harder. Give it a try yourself. It’s helpful to have a great base in bridging movements before trying any of this.

This Scorpion pose is also known as Vrschikasana in yoga, although that may refer to the version where it’s a forearm stand rather then on the hands. And an interesting little philosophy on this move.

The head, which is the seat of knowledge and power, is also the seat of pride, anger, hatred, jealousy, intolerance and malice. These emotions are more deadly than the poison which the scorpion carries in its sting. The yogi, by stamping on his head with his feet, attempts to eradicate these self-destroying emotions and passions. By kicking his head he seeks to develop humility, calmness and tolerance and thus to be free of ego. The subjugation of the ego leads to harmony and happiness. Read more here.

Work on your handstand scorpion and you’ll not only build balancing ability, but great back flexibility and it can lead up to the other movements shown here. Plus it may help you free yourself from your ego 🙂

Comments { 7 }

Handstand Backbend

There are people that believe you should have no backbend in your handstand at all. That only the straight handstand is how to do a handstand.

But I don’t believe that. Just look at how many contortionists balance using excessive back bend.

Walking and Jumping On Your HandsWalking and Jumping On Your Hands on Amazon

When we’re talking about handstand backbend we can be talking about two things.

1) How much backbend you have in your handstand.
2) Going from a handstand into a backbend or a bridge. You might also call this a handstand to bridge.

This video shows you both.

Handstand Backbend

If you’re trying to do this, you don’t need as much back bend as this fellow has but it certainly helps. I would highly recommend improving your gymnast bridge before trying this exercise out.

Comments { 2 }